20September 2026
Most DIY drywall content will tell you it’s simple. Buy a patch kit, slap on some mud, maybe hit it with texture spray, roll on paint, and you’re done. What that content won’t tell you is that the gap between “patched” and “invisible” is much wider than most tutorials admit.
I’ve been patching drywall in Oakville homes for years. From bungalows in Old Oakville to newer townhomes in West Oak Trails, I’ve seen the same mistakes over and over. I’ve also been called back to fix botched DIY repairs that turned a $150 job into a $400 redo. This post is my honest breakdown of what it actually costs to fix a hole in the wall yourself, what goes wrong most often, and when you’re better off just calling someone.
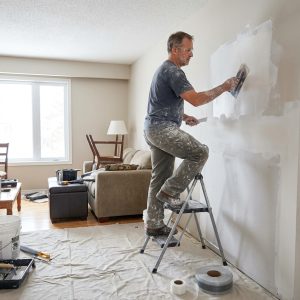
The Most Common Reasons Homeowners Try to Fix Holes Themselves
The most common “I’ll just fix this myself” moment happens after a homeowner tries to hang something heavier than a picture frame. Usually it’s a TV bracket, a floating shelf, or a large mirror, and the result is one or more blown-out anchor holes that are too big for a simple spackle job.
Here are the situations I see most often across Oakville:
- Removing old picture frames or mirrors, leaving small nail holes (1 to 3 mm) or slightly enlarged holes from plastic anchors that were yanked out
- Mounting a TV, leaving multiple oversized holes (half to three-quarters inch) from failed toggle or self-drilling anchor attempts, sometimes with cracked drywall around them
- Hanging shelves or cabinets, where the shelf pulled away from the wall leaving a cluster of quarter to half-inch holes and some surface damage
- Re-hanging decor in a new home, with a mix of small nail holes and medium anchor holes from previous owners’ arrangements
Why Oakville Homeowners Reach for the Spackle First
- The cost-conscious mindset. Many folks want to avoid a $150 to $250 service call for what looks like a “small” hole
- Quick fixes seem easy. Online tutorials make patching look straightforward, especially for small holes
- Rental or resale pressure. Tenants wanting their deposit back, or sellers prepping a home for listing, often tackle minor drywall repairs themselves
That said, once a hole gets beyond about half an inch, or if there are multiple holes close together, the repair moves from “toothpaste-and-spackle” territory into needing a proper drywall patch, backing, and feathered joint compound. At that point, a DIY attempt without the right technique is more likely to make things worse than better.
What It Actually Costs to Fix a Hole by Yourself
The real answer depends entirely on the size of the hole and what you already have in your garage. Here’s what I actually see people buying, what they really need, and realistic costs in the GTA market.
Small Nail or Picture Frame Holes (Under a Quarter Inch)
What works best: lightweight spackle in a small tub or squeeze tube.
Typical shopping list:
- Lightweight spackle (8 oz to 1 quart): $5 to $12
- Small putty knife or flexible filler blade (1 to 2 inch): $3 to $8
- Fine sandpaper or sanding sponge (120 to 220 grit): $3 to $6
- Small primer sample or spray primer: $6 to $12
Realistic total: $15 to $35 if you already have a knife. $25 to $45 if you’re starting from scratch.
What I see people do wrong:
- Buying a 1-gallon tub of all-purpose joint compound “because it’s cheaper per litre,” then letting it dry out and throwing most of it away. For a few nail holes, that’s false economy
- Skipping primer and then wondering why the patched spots look dull or darker after painting
Small Anchor Holes or Blown Plastic Anchors (Quarter to Half Inch)
What works best: vinyl or all-purpose spackle, or a small tub of pre-mixed joint compound if you’re also doing other patches.
Typical shopping list:
- Vinyl or standard spackle (1 quart): $7 to $12, or small joint compound tub (1 to 2 L): $8 to $15
- Putty knife (2 to 3 inch): $4 to $10
- Sanding sponge: $3 to $6
- Primer (small can or spray): $6 to $12
Realistic total: $20 to $45.
Common overspend: buying a 4.5-gallon bucket of joint compound ($15 to $25) for one or two anchor holes. That’s pro-scale material for a condo touch-up.
Medium Holes (Half Inch to 3 Inches)
This is where you move from “just spackle” into patch territory. Think failed TV anchors, doorknob punches, or clusters of anchor holes from a pulled-off shelf.
What works best: a self-adhesive mesh patch or drywall repair patch kit, all-purpose joint compound or setting-type compound for strength, a taping knife for feathering, and primer plus paint.
Typical shopping list:
- Mesh patch kit or pre-cut patches (2 to 6 inch): $8 to $20
- All-purpose joint compound (1 gallon or 1 to 2 L tub): $10 to $20
- Taping knife (4 to 6 inch): $6 to $12
- Sanding sponge or pole sander head: $4 to $8
- Primer plus small paint sample or matching wall paint: $10 to $25 combined
Realistic total: $35 to $75 for a solid one-wall repair kit.
What I see people buy unnecessarily:
- Expensive “textured” patch kits when their walls are flat or lightly orange-peel. They end up with a bumpier patch than the original wall
- Multiple specialty products (separate filler, texture spray, primer, paint) when a basic joint compound, primer, and matched paint would do
Larger Holes (3 to 6 Plus Inches)
Now you’re in backer-board or California patch territory. Big TV mount failures, multiple anchors, or a “gaping mess” from several failed attempts.
What you really need:
- A piece of drywall or a pre-made patch
- Joint compound (all-purpose or setting-type)
- Drywall tape (paper or mesh)
- Utility knife, drywall saw, screwdriver, screws
- Taping knives (4 to 6 inch and 10 to 12 inch for feathering)
- Primer and paint
Typical shopping list if you’re buying everything new:
- 4×8 drywall sheet (you’ll use a fraction): $18 to $32, or pre-made patch kit: $15 to $30
- Joint compound (1 gallon): $10 to $20
- Drywall tape: $4 to $8
- Taping knives (set): $10 to $20
- Sanding supplies: $5 to $10
- Primer plus paint: $15 to $30
Realistic total: $60 to $120 if you’re buying everything new. Less if you reuse tools.
Overspending patterns at this level:
- Buying multiple “repair kits” instead of one decent taping knife set and a gallon of joint compound you can use for future patches
- Paying for texture spray you never practice on, then ending up with a patch that stands out more than the hole did
What I Actually See in Shopping Carts Around Oakville
- Nail-hole-only jobs: most homeowners spend $20 to $40 at Home Depot or Canadian Tire on a spackle tub, a cheap knife set, sandpaper, and primer. That’s about right
- Anchor or TV-mount holes: I often see carts with a $20 joint compound bucket, a $25 patch kit, a $15 texture spray, and a $20 paint sample. That’s $80 or more in materials for what a pro could patch and blend for $150 to $300 all-in
- Big “I’ll fix the whole wall myself” projects: people drop $100 to $150 on tools and materials when a single professional patch-and-paint might run $250 to $400 but with a much better finish and no risk of a visible dip or bad texture
The Mistakes That Turn a Simple Patch Into a Visible Mess
Almost every “simple patch” that turns into a visible mess comes down to the same handful of mistakes. I see the same patterns in bungalows, townhomes, and condos from Morrison to Glen Abbey.
The One Mistake That Happens Every Single Time
Not feathering the edges wide enough.
Homeowners put compound just over the hole or patch, then stop abruptly at the edge. That creates a raised ring or “picture frame” that shows under paint, especially with side lighting.
What it looks like: a smooth center with a visible ridge or shadow around the perimeter.
Why it happens: they use a small knife and think “cover the hole” instead of “blend into the wall.”
What pros do: feather the compound at least 6 to 8 inches beyond the damage, using thin coats and a wider knife to taper the edges into the existing wall.
If I had to pick just one thing that makes DIY patches obvious, it’s this.
Applying Too Much Compound in One Coat
Thick globs of spackle or joint compound shrink as they dry, crack, and leave a hump. The result is a visible bump that catches light, even after painting.
The better approach: multiple thin coats, letting each dry, then sanding lightly between coats. Pros average around three thin coats for a clean blend.
Skipping or Rushing Sanding
Under-sanding leaves ridges, trowel marks, and rough edges that show under paint. Over-sanding digs into the patch, creates low spots, or even exposes tape and mesh.
What I see most often: people either skip sanding entirely or aggressively sand just the center, making a dip surrounded by a ridge.
The better approach:
- First pass: 120 grit to knock down high spots
- Final pass: 150 to 220 grit to smooth and feather edges
- Check with your hand and angled light before priming
Painting Over a Wet or Under-Dried Patch
The surface feels dry but the compound is still curing underneath. Paint traps moisture, leading to cracking, poor adhesion, and flashing. The patch looks fine day one, then cracks or shows a dull or glossy spot later.
Wait until the compound is fully dry, often 12 to 24 hours depending on thickness and humidity, then prime.
Skipping Primer
This is the second most universal error after poor feathering.
Joint compound and spackle are more porous than drywall paper, so they absorb paint differently. That causes “flashing” where the patch looks duller, darker, or shinier than the rest of the wall, even with the same paint.
What I see: homeowners patch, let it dry, then roll paint right over it. The patch “disappears” when wet, then pops out once dry.
The fix: seal the patch with a PVA or stain-blocking primer before topcoat. Prime the patched area and a bit beyond so absorption is uniform.
Texture Mismatch
Many Oakville homes have light orange-peel or knockdown texture. DIYers often create a perfectly smooth island in the middle of a textured wall.
Common errors:
- Leaving the patch smooth on an orange-peel or knockdown wall
- Spraying texture only on the patch without blending into the surrounding area, creating a hard “box” outline
- Using the wrong texture type or coarseness
Even with perfect colour match, the patch is obvious because the surface catches light differently.
The better approach:
- Identify the existing texture (orange peel, knockdown, skip-trowel, etc.)
- Test the texture on cardboard or an inconspicuous spot first
- Extend the texture slightly beyond the mud patch so there’s no hard edge
Spot-Painting Instead of Painting the Whole Wall
Even with good priming, painting just the patch can create a sheen halo because the new paint layer has a different thickness and gloss than the aged wall. For best results, paint the entire wall corner-to-corner, or at least wall-to-wall in that section, especially on light colours or glossy finishes.
A Real Job: The Glen Abbey “Three Shiny Donuts”
A few years ago I got called to a condo in Glen Abbey where the owner had tried to fix three anchor holes from a TV mount himself. He’d used a big tub of joint compound, piled it on thick, and painted over it the same evening. Under the living-room lamp, the wall looked like it had three shiny, raised donuts.
He told me, “I thought if I put enough mud on, it would just disappear once painted.”
I had to scrape off most of his work, re-patch with thin coats, feather the edges a good 8 inches, sand, prime, and then repaint the entire wall to avoid a sheen halo. All in, it was about a 2.5-hour job plus materials. Roughly $320 to $380 in the GTA, when a proper first-time patch could have been done for under $200.
The takeaway I tell homeowners: a small, well-feathered patch with primer is invisible. A thick, unprimed blob is what turns a $150 fix into a $350 redo.
The Honest Take: When DIY Works and When It Doesn’t
Here’s the slightly contrarian take I give Oakville homeowners when they’re about to turn a $150 patch into a $400 redo: “If you care whether it’s invisible, it’s not a DIY job.”
Most “how to patch drywall” articles and YouTube tutorials sell a comforting story. Buy a patch kit, slap on some mud, maybe hit it with texture spray, roll on paint, and boom, perfect wall. What they don’t show is the 80% of repairs that look fine in the thumbnail but stand out like a sore thumb in real life, especially under evening lamps or morning sun.
My firm rule, after seeing the same mistakes over and over:
- Nail holes and tiny dings in low-visibility areas? Go ahead, DIY with spackle
- Anything bigger than a fist, on a textured wall, or in a main living area? If you want it to truly disappear, budget for a pro
That “fist-sized” threshold isn’t random. Past that size, you’re no longer filling a hole. You’re doing a mini drywall install: cutting, backing, taping, multiple coats, feathering, texture, primer, and blending paint. Most tutorials gloss over how much skill lives in those last three steps.
Texture Spray Is the Number One Overconfident Purchase
I genuinely wish more homeowners would stop buying aerosol texture cans on impulse.
- They almost always spray heavier and coarser than the existing wall
- The pattern rarely matches exactly, and the transition edge is brutal to blend
- Once you’ve sprayed texture, you’ve committed. Sanding it back off is a pain, and repainting the whole wall is usually required anyway
If your wall has any orange peel, knockdown, or skip-trowel, assume your patch will be noticeable unless you:
- Test on cardboard first
- Feather the texture well beyond the patch
- Are okay repainting the entire wall
Most DIYers do none of those three.
YouTube Gives False Confidence by Editing Out the Hard Parts
A 10-minute video can make a pro-level repair look like a weekend project. What’s missing:
- Years of muscle memory for knife angle, pressure, and feathering
- The ability to “read” a wall in raking light and adjust on the fly
- The willingness to do three thin coats, sand, then still decide it needs another skim
The result: homeowners nail the “patch the hole” part, then create a visible bump, halo, or texture island that’s more distracting than the original damage.
“Good Enough” Is Fine, Until It’s Not
A lot of content implies you can get a “perfect” finish with enough patience. Reality check:
- In a hallway, backlit by a window, even a decent DIY patch will show as a subtle sheen or texture change
- In a rental or a basement rec room, “good enough” is often totally acceptable
- In a main-floor living room you’re trying to sell or just want to look clean, that “almost invisible” patch becomes the one thing every buyer or guest notices
If you wouldn’t be okay seeing it every time you walk by, don’t DIY it.
The Real Cost Isn’t the Materials, It’s the Redo
Materials for a small patch are cheap: $20 to $50. But when the finish isn’t right, the real cost is:
- Your time scraping, re-mudding, sanding, and repainting
- The emotional energy of staring at a wall that bugs you every day
- Eventually calling a pro anyway, who now has to undo your work before doing it right
I’d rather a homeowner spend $150 to $250 once on a clean, invisible repair than $60 on supplies plus $300 later to fix a botched job.
Three Questions to Ask Before You Crack Open That Tub of Joint Compound
Before you start, ask yourself:
- Is this wall textured? If yes, and you care about it blending, strongly consider a pro
- Is this a high-visibility area? Hallways, living rooms, and entryways are the worst places to practice
- Am I okay with “noticeable but functional”? If the answer is no, your time and stress are probably worth more than the service call
DIY drywall repair isn’t impossible. But the gap between “patched” and “invisible” is much wider than most content admits. For small, low-stakes holes, go for it. For anything you truly want to disappear, the honest answer is: call someone who does this every day and let them earn their $150 to $300.
2 Replies to “How Much Does It Cost to Fix a Hole in the Wall by Yourself?”