
14October 2026
I’ve spent 8 years doing hands-on repair and maintenance work in Oakville homes. I’m not an inspector or a contractor. I’m the person who shows up, finds the small problem before it becomes the expensive one, and fixes it. Over the years I’ve learned that most of the damage homeowners worry about in January traces back to something they could have addressed in October for a fraction of the cost.
This is not a 40-item checklist. It’s the ten jobs I actually prioritize when I walk an Oakville property in the fall, in the order I’d do them, with my honest take on which ones you can handle yourself and which ones are worth getting help with.
How I Prioritize Fall Work
Most fall maintenance lists treat every task as equally important. In my experience, they aren’t. If I had to rank what actually protects an Oakville home through winter, it goes like this:
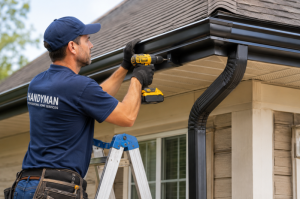
- Drainage first. Gutters, downspouts, grading, and water discharge.
- Exterior water entry points second. Failed caulk, soft trim, gaps around windows and doors.
- Drafts and comfort third. Weather-stripping, door sweeps, sticking doors.
- Everything else after that.
I also want to flag something I see too often: homeowners reaching for expanding foam to plug every gap around a window or door. In most cases, that’s the wrong tool. Properly prepared exterior-rated caulk does the job better, doesn’t bow a frame, and makes future repairs easier. Save the foam for the specific situations where it’s designed to work.
Job 1: Clean Eavestroughs and Flush Downspouts
Why It Matters in Oakville
Oakville streets are lined with mature maples and oaks. By mid-October, a thick mat of leaves can pack into your eavestrough, compress the downspout, and turn a simple drainage system into a water trap. When that trapped water freezes, you get ice dams, overflow at the fascia, and water sitting against your foundation through the freeze-thaw cycles that define a Halton winter.
A one-line summary: blocked eavestroughs are the single most common cause of preventable water damage I see in Oakville homes.
What I Look For on a Visit
- Leaves compacted into a soggy mat that’s no longer draining freely
- Water pooling or weeping over the eave edge instead of flowing to the downspout
- A loose or missing bracket that’s let a section sag
- Debris clogging the downspout elbow at the bottom
- Overflow stains on the fascia or siding below the gutter line
DIY or Call a Pro
If your home is single-storey and you’re comfortable on a step ladder, you can do a basic clean yourself. For two-storey homes, or any eavestrough that’s wet, icy, or has a steep roof pitch, I’d call it a professional job. Ladder work on a wet roofline is where most serious home-maintenance injuries happen.
Typical handyman range: $150–$350 for a full clean and flush, depending on pitch, height, and extent of debris. Typical time: 1.5–3 hours.
When to Do It
Here’s where I push back on the generic advice. “Clean your gutters in the fall” is not specific enough. In Oakville, I recommend inspecting in early to mid-October, then doing the real clean after most leaves have dropped but before the first hard freeze. On a maple-lined street in Old Oakville or Glen Abbey, an early-October clean can look perfect one week and be full again the next. Time the full clean for late October or early November, when the ground is clear and the eavestroughs will stay clear through winter.
From a Recent Oakville Job
On a two-storey home I visited in mid-fall, the eavestrough run above a finished basement was packed with maple leaves that had compacted into a thick, soggy mat. The downspout was barely draining, and water was overflowing near a corner above a landscaped bed that sloped back toward the house. I removed the debris, flushed the downspout and elbows, resecured a loose bracket, and extended the downspout discharge so water moved away from the foundation instead of pooling beside it. That October gutter clean was not glamorous, but it likely prevented a spring water problem beside a finished basement.
Job 2: Check Downspout Discharge and Grading
Why It Matters in Oakville
Cleaning the gutter but leaving the downspout dumping beside the foundation is only half the job. In Oakville, repeated water pooling near the foundation is a bigger long-term risk than the leaves themselves. Over a few wet seasons, that standing water works its way into the basement wall, softens the surrounding soil, and becomes the source of that spring leak you’ve been putting off.
What I Look For on a Visit
- A downspout that discharges within 60 centimetres of the foundation wall
- Ground that slopes back toward the house instead of away from it
- A splash block that’s cracked, missing, or directing water under the eave
- Standing water in the landscape bed after a rain
- Efflorescence (white chalky marks) on the foundation or basement wall, which signals moisture movement
DIY or Call a Pro
You can extend a downspout yourself with an inexpensive elbow and a section of pipe. Minor grading adjustments with a shovel and some fill soil are also within a homeowner’s range if you’re comfortable moving a small amount of earth. If the grading issue is significant or the water is already entering the basement, that’s a drainage specialist or a licensed plumber’s call.
Typical handyman range: $100–$250 for downspout extensions and minor grading correction. Typical time: 1–2 hours.
When to Do It
Do this immediately after the gutter clean, while you’re already on the ladder and the system is clear. It’s the natural next step.
Job 3: Inspect and Renew Exterior Caulking
Why It Matters in Oakville
Oakville’s older housing stock is full of small joints where siding meets corner boards, where window trim meets brick, where hose bibs penetrate the wall. The caulk that was applied when the home was built, or at the last repaint, has a finite life. Once it cracks, shrinks, or pulls away, every rain, every snowmelt, and every freeze-thaw cycle pushes water behind the trim. What starts as a tube-of-caulk repair in October becomes rot repair, repainting, and possibly siding or framing work by next spring.
What I Look For on a Visit
- Caulk that’s cracked, split, or pulled away from the substrate
- Gaps at the joint where siding meets a corner board or a window jamb
- Soft, spongy trim around a window sill or door frame
- Discolouration or staining on the trim below a caulked joint, which suggests water has been getting behind it
- Missing caulk around utility penetrations, vents, or hose bibs
DIY or Call a Pro
If the failed caulk is on the first storey, accessible from a step ladder, and the joint is less than about 10 millimetres wide, you can handle it yourself. Scrape out the old material, let the joint dry completely, and apply a high-quality exterior-rated caulk (silicone or silicone-nylon for most applications). For joints above a step ladder, around windows with complex trim, or where the trim itself is soft and needs replacing, bring in a pro.
Typical handyman range: $75–$200 for a standard exterior caulk-up, depending on the number of windows, doors, and joints. Typical time: 2–4 hours.
When to Do It
This is the job with the hardest deadline on the list. Exterior caulk needs to be applied above roughly 10°C for proper curing and adhesion. Once October cools off and temperatures dip into single digits at night, your repair window closes. I’d rather see a homeowner walk the exterior in late September or early October, find the failed sealant, and fix it while the temperatures are still workable. A tube of exterior caulk in October is much cheaper than replacing rotted trim in April.
From a Recent Oakville Job
On an older Oakville home, I noticed cracked, shrinking caulk around a window trim and where siding met a corner board. It did not look like a major issue from the sidewalk, but during a wet fall rain, water was getting behind the trim. I scraped out the failed caulk, let the joint dry, sealed the gaps with exterior-rated caulk, and replaced one small section of soft trim before it spread. The repair was minor at that point. If it had been left alone, repeated rain, snow, and freeze-thaw could have turned a small sealing job into rot repair, repainting, and possibly larger siding or framing work.
Job 4: Replace Worn Door Weather-Stripping and Sweeps
Why It Matters in Oakville
A drafty exterior door is a comfort problem first and an energy problem second. In winter, you’ll feel the cold draft in the hallway or entryway, and the furnace will run longer to compensate. The fix is often a $100-ish weather-stripping and door-sweep job that takes a couple of hours.
What I Look For on a Visit
- Flattened or compressed weather-stripping around the door jamb
- A worn or missing bottom sweep with a visible gap under the door
- Daylight visible around the door frame when it’s closed
- A strike plate that’s been shifted, allowing the door to close with a gap
- Cold air you can feel moving around the frame on a windy day
DIY or Call a Pro
This is one of the easiest jobs on the list. If you have a screwdriver and a utility knife, you can replace the weather-stripping and the door sweep yourself. Measure the door, buy the matching compression strip and sweep, and install. Adjusting the strike plate is also a straightforward DIY task if the door is closing with a gap on one side.
Typical handyman range: $75–$150 for all exterior doors on a standard home. Typical time: 1–2 hours.
When to Do It
Anytime before the first hard freeze. This one doesn’t have a curing deadline like caulk, but the longer you wait, the longer you’re running the furnace against a cold draft.
From a Recent Oakville Job
A homeowner near Oakville called me in late October about a side door that always felt cold. The weather-stripping was flattened, the bottom sweep had a gap, and you could feel air moving around the frame on a windy day. I replaced the door sweep, installed new compression weather-stripping around the jamb, adjusted the strike plate so the door closed snugly, and caulked a few small gaps on the exterior trim. The job took a couple of hours. By January, the homeowner told me the hallway by that door was noticeably warmer and the furnace was not cycling as often. I would not promise an exact gas-bill savings, but the comfort change was obvious, and that is often what homeowners notice first.
Job 5: Check Exterior Doors, Locks, Hinges, and Thresholds
Why It Matters in Oakville
A door that sticks, a hinge that’s loosened, or a threshold that’s rotted out can all let in cold air and moisture in ways that are hard to fix once the problem has spread. In an older Oakville home, the exterior doors have been opening and closing for decades. The hardware wears, the paint swells in wet weather, and the thresholds take a beating from foot traffic and snow.
What I Look For on a Visit
- A door that sticks or rubs on the frame, especially in the corners
- Loose or stripped hinge screws
- A threshold that’s soft, rotten, or missing
- A latch that doesn’t engage fully with the strike plate
- Swollen paint or wood around the door frame, especially on the weather side
DIY or Call a Pro
Tightening hinge screws, adjusting a strike plate, and replacing a worn threshold are all within a homeowner’s range if you have basic hand tools. If the door frame itself is soft or the door needs planing, that’s a job to hand off.
Typical handyman range: $100–$300 for door adjustments, hardware replacement, and threshold repair. Typical time: 1–2 hours.
When to Do It
Before the first cold snap, when the wood is still dry enough to adjust. If a door is sticking because of swelling from a wet fall, it may improve in drier weather. If it’s sticking because of warping or hardware failure, it won’t.
Need help with the ladder work or the exterior checks? I help Oakville homeowners with eavestrough cleaning, downspout checks, exterior caulking, weather-stripping, door adjustments, fence and gate repairs, trim repairs, and other fall maintenance. I don’t handle gas, major electrical, structural, or roofing work, but I can help spot issues early and refer you to the right licensed trade when needed. Call or text (289) 207-6699 to book a fall maintenance visit.
Job 6: Disconnect Hoses and Protect Exterior Faucets
Why It Matters in Oakville
It sounds minor until a frozen hose bib bursts in January and you’re dealing with a water-damaged basement wall. In Oakville, exterior faucets are exposed to the full range of Halton winter temperatures. A small amount of residual water in the line, trapped by a frozen outdoor temperature, is enough to crack a fitting or a section of pipe.
What I Look For on a Visit
- A garden hose still connected to an exterior faucet
- No interior shut-off valve, or one that’s hard to reach
- A faucet that’s leaking or dripping
- A hose bib that’s corroded or showing signs of freeze damage from a previous winter
- No insulation cover on the hose bib in a cold-exposed location
DIY or Call a Pro
This is squarely a DIY job. Disconnect the hose, drain it, and store it. If your home has an interior shut-off valve for the exterior faucet, close it before the first freeze. If you don’t have an interior valve, an insulated hose bib cover will help, but it’s not a substitute for a proper interior shut-off. If a hose bib is leaking or corroded, a replacement is a straightforward job for a handyman or plumber.
Typical handyman range: $75–$150 for hose bib replacement or insulation cover installation. Typical time: under 1 hour.
When to Do It
Before the first freeze. In Oakville, that’s typically mid-to-late November, but it can come earlier in a cold snap. Don’t wait for the thermometer to hit zero.
Job 7: Inspect Fences, Gates, Decks, and Exterior Wood Trim
Why It Matters in Oakville
Wood takes on moisture in a wet fall and then freezes. That freeze-thaw cycle is what splits boards, loosens nails, and softens the wood around fence posts and deck joints. If a fence or deck has a loose board or a wobbly post heading into winter, the winter weather will make it worse. By spring, what was a minor repair is a structural one.
What I Look For on a Visit
- Fence or deck boards that are loose, split, or splintering
- A fence post that’s wobbly or leaning
- Corroded or stripped fasteners
- Soft, spongy wood at the base of a fence post or a deck beam
- Peeling or blistered paint on exterior trim, which signals trapped moisture underneath
DIY or Call a Pro
Tightening a loose board, replacing a single fence picket, or touching up paint on a small section of trim is all DIY territory. If a fence post is rotting at the ground line, a deck joist is soft, or multiple sections of fencing need replacing, that’s a pro job.
Typical handyman range: $100–$400 for minor fence and deck repairs, depending on extent. Typical time: 2–4 hours.
When to Do It
Before the first freeze. Once the wood is saturated and starts to freeze, it’s harder to work with and the damage will spread through the winter.
Job 8: Touch Up Exterior Paint and Seal Exposed Wood
Why It Matters in Oakville
Paint is your first line of defence against moisture getting into wood. Once the paint film is compromised, the wood underneath starts to absorb water, and the freeze-thaw cycle does the rest. In an older Oakville home, the areas most vulnerable are window sills, door frames, fascia-adjacent trim, and any spot where the paint has been scraped, dinged, or exposed by a previous repair.
What I Look For on a Visit
- Paint that’s peeling, blistering, or cracking
- Exposed, unpainted wood on trim, sills, or fascia
- Fresh caulk that’s not yet painted (caulk needs to be painted within a reasonable window to protect it)
- Rust stains around metal trim or flashing, which signal trapped moisture
- A spot where a previous repair was done but the surrounding paint was never touched up
DIY or Call a Pro
Touching up a few spots on the first storey is a DIY job. If you need to scrape, sand, prime, and paint a larger area, or if the work is above a step ladder, it’s worth getting help.
Typical handyman range: $150–$400 for a standard exterior touch-up. Typical time: 3–5 hours.
When to Do It
The same window as your caulk work. You want to be working in temperatures where paint and caulk will cure properly. Late September through October is the sweet spot in Oakville.
Job 9: Check Interior Draft Points and Insulation Gaps
Why It Matters in Oakville
You don’t need to turn this into an energy audit, but a quick walk through the house in the fall can catch the small gaps that add up to a noticeably colder home in winter. The attic hatch, the basement rim joist, the area around dryer vents, and any visible gaps around penetrations are the usual suspects.
What I Look For on a Visit
- An attic hatch that’s missing a gasket or weather-seal
- Visible gaps around the basement rim joist where the slab meets the foundation wall
- Air movement you can feel around a dryer vent, a range hood, or a plumbing penetration
- A basement window well that’s not sealed properly
- A crawl space hatch that’s not insulated
DIY or Call a Pro
Most of these checks are visual and DIY. If you find a significant insulation gap in the basement or attic, or if you suspect air is leaking through a wall cavity, that’s where a professional inspection or a licensed HVAC contractor makes sense.
When to Do It
Anytime in October. This one doesn’t have a hard deadline, but doing it before the heating season starts gives you time to address anything you find.
Job 10: Do a Safety and Small Repair Sweep
Why It Matters in Oakville
The holidays are coming, and with them, guests, decorations, and a house that gets more traffic than usual. A loose handrail, a cabinet that’s falling off its hinge, a smoke detector that’s beeping at 2 a.m., or a drywall nail pop that’s been bugging you all year are all small things that add up to a house that doesn’t feel quite right.
What I Look For on a Visit
- Smoke and CO detectors that need a battery replacement or a test
- Handrails that are loose or wobbly
- Steps that are loose or uneven
- Cabinet doors that are sagging or won’t close properly
- Drywall nail pops, small cracks, or scuffs that have been accumulating
- Light fixtures that are flickering or humming
DIY or Call a Pro
Replacing a smoke detector battery, tightening a cabinet hinge, or patching a small drywall nail pop are all DIY. If a handrail is loose and the mounting screws are stripped, or if a light fixture is flickering (which can indicate a loose wire connection), that’s a job to hand off.
Typical handyman range: $100–$300 for a general small-repair sweep. Typical time: 2–3 hours.
When to Do It
Anytime before the holidays. No hard deadline, but the earlier the better.
Leave This to the Right Pro
There are a few things on a typical fall checklist that fall outside my scope, and I’d rather be upfront about that than have you assume I can handle them.
- Furnace servicing and gas work. Have your furnace inspected and serviced by a licensed HVAC technician before the heating season.
- Major electrical work. A flickering fixture or a tripping breaker is a sign to call a licensed electrician, not to open the panel.
- Roof repairs or replacement. A ground-level visual check for missing shingles or damaged flashing is something you can do from the ground. Anything above that is a licensed roofer’s job. A small roof issue left through winter can become a ceiling leak in January.
- Chimney work. Have your chimney inspected by a certified sweep before you light the first fire.
- Structural or foundation repairs. If you’re seeing significant cracks in the foundation, or water is entering the basement in volume, that’s a structural engineer or a licensed contractor’s call.
- Major plumbing repairs. A dripping hose bib is a handyman or plumber job. A frozen burst pipe is an emergency plumber call.
The reason I list these out is that I’ve seen homeowners try to handle the first stage of a structural or gas problem as a DIY fix and end up with a much bigger problem on their hands. If you’re in doubt, get a second opinion from the right licensed trade.
Final Thoughts
This list is not exhaustive, and your home may have specific issues that aren’t on it. But if you work through these ten jobs in order, you’ll have addressed the things that cause the most damage in Oakville homes during winter: water, cold air, and the freeze-thaw cycle that amplifies both.
The goal isn’t perfection. It’s doing the right things at the right time so that the small problems of this October don’t become the expensive problems of next spring.
Want a second set of hands before winter? I help Oakville homeowners with practical fall prep: gutter and downspout checks, exterior caulking, weather-stripping, door adjustments, drywall and trim repairs, fence and gate fixes, and small exterior maintenance. I don’t handle gas work, major electrical, structural repairs, or roofing replacements, but I can help identify issues early and point you to the right licensed trade when needed. Text or call (289) 207-6699 to book a fall maintenance visit or ask whether a job is worth doing now.
One Reply to “10 Fall Home Maintenance Jobs Every Oakville Homeowner Should Handle Before Winter”