
14September 2026
If you search for the cost to mount a 65-inch TV, you’ll usually land on a single number, something like “$200 average”, with a wide range tacked on. Those numbers are technically true and practically useless. They blend 32-inch jobs with 85-inch jobs, drywall with concrete, and cities with very different labour rates.
Here’s the version I’d give you as a neighbour and as someone who’s done these installs around Oakville: for a typical 65-inch TV mounted on standard drywall over wood studs, with basic cable tidy-up, most homeowners here pay about $180 to $280 all-in. That’s the number I’d actually budget against, not the big-box “starting at” quotes that end up hiding the real cost.
The reason that range matters is that it reflects what’s included. In my experience, that $180–$280 typically covers:
- Labour only, or labour plus a basic mount if the pro supplies one (mounts they upsell usually run $40–$120)
- Mounting into wood studs in standard drywall, no masonry, no fireplace surround
- Basic cable management: zip ties, surface clips, or a short in-wall fish if there’s an existing cavity
- Leveling and testing the TV with your existing devices, console, cable box, soundbar
Once you understand what’s in the base number, the real question becomes which version of the job you actually need. That’s where the price starts to move.
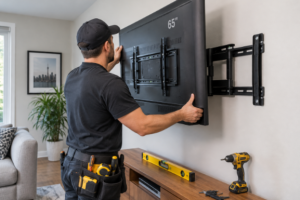
The Real Price Ranges for a 65-Inch Install
Here are the three scenarios I see most often locally, with the price bands that actually match what people pay in Oakville and the surrounding GTA.
1. Standard Drywall Mount (the most common job)
This is the bread-and-butter install: a 65-inch Samsung or LG on a fixed or low-profile tilt mount, on drywall with accessible studs, no fireplace. Cables are visible or lightly clipped, no in-wall kit.
What you’ll pay: roughly $175–$225 all-in, including a basic mount if you don’t supply one.
This is the job most older Oakville bungalows and townhomes need. The wall is straightforward, the studs are there, and the homeowner just wants the screen up, level, and out of the way of furniture.
2. Drywall Plus In-Wall Cable Concealment (the popular upgrade)
Same drywall and studs, but the homeowner wants the cables hidden properly, an in-wall power kit done to code, or low-voltage fishing with paintable wall plates.
What you’ll pay: roughly $260–$380 total.
In-wall concealment usually adds $100–$200 on top of the base mount, depending on whether the installer is just fishing an HDMI or power extension, or installing a proper, code-compliant in-wall power kit.
3. Brick, Stone, or Above a Fireplace (the involved jobs)
A 65-inch mounted on a masonry feature wall, over a stone or brick fireplace, or in a condo with poured concrete. These often use a pull-down or heavy-duty articulating arm.
What you’ll pay: roughly $350–$550 or more.
Brick, stone, and above-fireplace jobs routinely land in the $370–$550 band because of the extra labour, the specialized bits and anchors, and the safety checks around heat and load.
Why the National Average Misleads
National sites tend to quote something like $139 to $250 as the “average” for TV mounting, and some list even wider bands. The problem is that those figures are a blended average that mixes:
- Small 32–43-inch jobs at the low end
- Big 75–85-inch or complex installs at the high end
- Different wall types and different cities with different labour rates
When you isolate what you actually have — a 65-inch on drywall, stud-mounted, with minimal cable work — the realistic centre in Oakville is closer to $180–$220, creeping toward $260 once you add in-wall hiding or a full-motion arm. If a quote sounds much lower than that, ask exactly what changes once they see your wall.
The Mistakes I See Again and Again on 65-Inch Installs
The mistakes aren’t usually “they picked the wrong screw size.” They’re the big planning errors that show up job after job: the wrong mount for the room, no plan for power and cables, and mounting for the wall instead of the viewer. Here are the ones I’ve actually seen go wrong.
Buying the Cheapest Mount That “Fits Up to 75 Inches”
A homeowner grabs a $40 big-box mount labeled “fits 40–75” and assumes it’s fine for their new 65. It often is, until someone tilts it, the TV is on the heavy side, or the bracket flexes and the screen slowly leans.
I had a client in Glen Abbey with a 65-inch Samsung on a no-name full-motion arm. Six months later the TV was sagging about three degrees to one side; the thin steel arms had bent every time the kids swung it out to reach the console. We ended up replacing the mount and patching two extra holes where the old plate had started to tear at the drywall.
The rule of thumb: for a 65-inch, insist on a mount rated for your TV’s weight with some margin. Cheap fixed mounts can work. Cheap motion arms almost always become a regret.
Not Checking What’s Behind the Wall First
People pick the perfect spot, then discover too late that it’s all metal studs, a concrete or brick feature wall, or an electrical box and plumbing right where the mount needs to go. That turns a $200 job into a $400+ job once the installer has to change strategy mid-visit.
In an older Oakville bungalow near Lakeshore, a homeowner wanted the TV centred on a brick fireplace surround. The “pro” they’d booked online showed up expecting drywall, had no hammer drill or masonry bits, and tried regular anchors in the mortar. Halfway through, an anchor pulled loose and cracked a brick face. They had to reschedule, bring the right tools, and move the mount to solid mortar lines, extra labour, extra mess, and a visible repair patch.
If the wall is anything other than standard drywall over wood studsbrick, stone, tile, metal studs, condo concrete, say so up front when you book., It changes the tools, the time, and the price.
Half-DIY: “I’ll Drill the Holes, You Just Hang It”
Homeowners try to save $50–$100 by doing the “hard part” themselves — finding studs, drilling, bolting the plate — then call a pro to “just lift and click” the TV on. The problems I’ve seen:
- Plate not perfectly level, so the TV hangs crooked and can’t be adjusted
- Only one stud hit on a two-stud pattern, so the mount feels okay but is under-supported
- Holes in the wrong spots for the TV’s VESA pattern, so the arms don’t line up
A townhome owner in East Oakville pre-drilled and mounted a plate for a 65-inch, then asked me to hang the TV. The plate was about a centimetre off level, which is very obvious at 65 inches. The fix meant pulling the TV down, enlarging one hole, adding a toggle on the low side, and re-leveling, more time than if I’d done it start to finish, and extra patches on the wall.
If you’re going to DIY, do the whole job properly, or let the pro do the whole job. Half-and-half usually costs more in the end and looks worse.
Not Thinking About Cables Until the TV Is Already Up
The TV goes up looking clean, until someone plugs in a console, soundbar, or Apple TV and realizes the nearest outlet is four feet away, the cables are dangling down the wall, and there’s no path to hide them without drilling more holes.
In a new build near Third Line, a 65-inch was mounted perfectly over a media console with power behind the TV, but no low-voltage path. When they added a soundbar and a gaming console, three cables ran visibly down the wall. They later paid extra to have in-wall channels and brush plates installed, which meant removing the TV, cutting new openings, fishing, patching, and repainting. They essentially paid twice for labour.
Decide before you mount what devices will connect, where they’ll live, and whether you want cables hidden in-wall or just neatly clipped. Plan the power and cable path first, then pick the height and location.
Mounting for the Wall, Not the Viewer
This is the single most common regret I see with 65-inch TVs. People centre the screen on a big empty wall or above a fireplace because it “looks right,” then spend every movie with their necks craned back.
A family in West Oakville mounted their 65-inch so the bottom was about 48 inches off the floor, centre well over 60, to clear a tall console and make the wall look balanced. After a month everyone was complaining of neck strain. We moved the TV down about 8 inches, which meant patching the old holes, finding studs lower down, and re-routing the power. The wall looked the same, but the room suddenly felt right to sit in.
For living-room viewing from a sofa, aim for the centre of a 65-inch around 42–48 inches from the floor (seated eye level), not “centred on the wall.” If you must mount high, use a tilting or pull-down mount and accept it’s a compromise.
Ignoring VESA Pattern and Hardware
People buy a mount that “fits 65-inch TVs” but that doesn’t match their TV’s VESA hole pattern, comes with bolts that are too long or too short, or requires spacers they didn’t order. The TV won’t line up, or they force it and risk stripping threads or cracking the back panel.
A client brought their own mount for a 65-inch LG; the bracket’s horizontal spacing was 400 mm, but the TV was on a 600 mm VESA pattern. We had to swap in a different mount on the spot. Their “deal” mount ended up in the garage, unused.
Before you buy, check your TV’s exact VESA pattern (for example 400×400 or 600×400), the mount’s weight rating, and the included hardware against what your TV’s manual specifies. Match the mount to the model, not just the screen size.
No Slack for a Motion Mount
Full-motion arms get extended and swivelled, but if the cables were installed tight as if the TV were fixed, you’ll get a tug-of-war. Over time the HDMI or power connectors get stressed, the TV “pulls” when you adjust the angle, and ports start to fail.
In a condo near the QEW, a 65-inch on a full-motion arm had the HDMI and power run tight behind the TV. Every time the owner pulled the TV out to angle it toward the kitchen, the cables yanked hard on the ports. Within a year one HDMI port had become loose. The fix was re-routing with service loops and better strain relief, but the damaged port was a permanent reminder.
If you’re using a motion mount, leave deliberate slack and route the cables so they can move with the arm without tension.
Do You Actually Need a Full-Motion Mount? (My Honest Take)
A lot of people ask this without knowing how to phrase it, so here’s my straight answer after watching a lot of 65-inch installs around Oakville and the GTA: for most people, a good tilt mount is the better default. Full-motion is a niche tool, not the standard upgrade.
Here’s the pattern I see. On day one, everyone loves pulling the TV out, swivelling it toward the kitchen, angling it for the “perfect” view. By month three it’s back against the wall in basically the same position a tilt mount would have put it. By year one, the motion gets used for occasional cleaning behind the TV or one specific event. In a room with one obvious primary seat, the full-motion range is rarely used more than a handful of times after install day.
Meanwhile the downsides stick around every day: the TV sits farther from the wall (often 3–4 inches versus 1–2 for a tilt mount), there are more moving parts that can loosen or sag over time, and cable management is trickier because the cables have to flex as the arm moves.
When I’d Default to a Tilt Mount
In my own work, I default to tilt for a standard 65-inch in a normal living room. Tilt is the better call when:
- There’s one main seating area, straight-on, on a flat wall
- The TV is going above a fireplace, where you mostly need downward tilt anyway
- You’re budget-conscious and don’t have a clear multi-angle need
In that setup a tilt mount keeps the TV closer to the wall, costs less, and has fewer parts to fail. In my own home, my main 65-inch is on a quality tilt mount. If you’re the type who sets it once and rarely touches it, fixed or tilt is the right call.
When Full-Motion Actually Earns Its Keep
There are specific setups where I’ll say “yes, spend the extra $60–$100 on a quality full-motion arm”:
- Corner installations, where seating is on two different walls and a fixed mount only serves one angle
- Open-concept living, kitchen, and dining spaces, where you genuinely watch from multiple directions, one of the few scenarios where owners tell me they use the motion regularly
- Rooms with multiple distinct viewing zones, like a basement rec room with a couch on one side and a bar or play area on the other
- Multi-use spaces where you actually need to extend and re-angle the screen for different activities
The only full-motion 65-inch I’d install for myself is in a basement rec room or open-concept space where I know I’ll actually use the swing. For everything else, full-motion is a nice idea that mostly sits retracted on the wall, looking like a fancier version of a $40 fixed bracket.
DIY or Call a Pro? Where I Draw the Line
People think the question is “am I capable?” It isn’t. The real question is: “If this goes wrong, how bad is the downside, and do I own the right tools for this wall?” That’s what drives my own yes or no.
I’d Do This Myself
If all of these are true, I treat it as a reasonable weekend DIY:
- The wall is standard drywall over wood studs
- I’m using a fixed or low-profile tilt mount, not a big extension arm
- Cables are visible or on simple surface clips, with no in-wall power kit
- I’ve got a second person to lift and hold the TV
- I already own a decent stud finder, drill/driver, level, and the right lag screws
In that scenario I can locate and mark two studs, pre-drill and mount the bracket, set a comfortable viewing height (centre around 42–48 inches), and hang the TV without dropping it or scratching the wall. It’s a one- to two-hour job, and the risk is mostly cosmetic, a few extra holes if I mis-measure.
If I’m missing any of those conditions, no helper, unsure about studs, only cheap anchors, or I’m rushing, I flip to “call someone.” The TV is too big and too expensive to gamble on a half-setup.
I’d Rather Pay and Let a Pro Handle It
These are the grey-zone jobs where I could DIY, but the time, tools, or annoyance tip the scale toward “worth $200 to have it done right”:
- Drywall with in-wall cable concealment, where I want a clean, code-compliant result and don’t want to risk patching and painting mistakes
- A particularly heavy 65-inch or a tight, fussy layout where the lift and precision start to feel like “why am I risking my back and my $1,000-plus screen?”
- A basement, guest-room, or rental TV where my weekend is already full and a one-visit pro saves me a half-day of hardware-store runs
This last one is less about skill and more about opportunity cost.
I Would Not DIY This at All
These are the setups where, even as a handyman, my answer is “don’t DIY this.” The combination of risk, required tools, and potential repair cost is too high:
- Brick, stone, or concrete walls — you need a rotary hammer, masonry bits, and properly rated anchors, and one wrong hole can crack the surface or hit rebar and utilities in a condo
- Above-fireplace installs, where height, heat, and awkward angles make failure more costly
- Metal studs or unknown wall construction, where wood-stud lag screws won’t work and you need the right specialty fasteners at the right torque
- A heavy 65-inch on a long-extension motion arm with only one shaky stud to work with
To sum it up: in my own home, a standard 65-inch on a normal living-room wall? Sure, I’ll do that in an afternoon. Anything involving masonry, fireplaces, or hidden power? I’m writing the cheque and letting a pro deal with the drills, anchors, and code stuff.
How to Pick a Good TV-Mounting Pro in Oakville and the GTA
The difference between a good pro and a bad one usually shows up before they ever touch the wall, in how they quote, what they ask, and whether they’re honest about their limits. Here’s how I’d vet them if this were my own TV.
Green Flags Before You Book
A good installer will ask about the wall before giving a firm price. They want to know the TV’s size, model, and approximate weight, the wall type (drywall over wood studs, plaster, brick, stone, or concrete), whether you want cables hidden or just tidy, and whether it’s over a fireplace or in a condo with building rules.
Their pricing should be clear about what’s included. A transparent quote spells out labour-only versus mount included, fixed/tilt versus full-motion, drywall versus masonry, and surface clips versus an in-wall kit, plus any certificate-of-insurance requirements if you’re in a condo.
They should be comfortable talking about mounts, VESA, and weight. A competent installer will casually reference your TV’s VESA pattern, the mount’s weight rating, and whether they supply hardware that matches your manual.
Red Flags — Walk Away If You See These
- No questions about your wall or TV model before quoting
- “We’ll figure it out when we get there” as the main plan for wall type or cables
- Vague “starting at” pricing with no explanation of what could increase it
- No talk of VESA, weight ratings, or the difference between fixed, tilt, and full-motion
- No proof of insurance when you’re in a condo or they’re working at height
- No written scope, no workmanship warranty, or a refusal to put anything in writing
- A pattern in reviews of crooked installs, wall damage, no-shows, or surprise fees
What On-Site Should Look Like
A good pro confirms the viewing height with you (centre around 42–48 inches for a living room), checks for glare and furniture alignment, marks the bracket, steps back, and confirms before drilling — and discusses the cable path up front. A bad one drills first and answers questions when you complain it’s too high or crooked.
They should show up with the right tools for your wall: a stud finder, level, drill/driver, and lag screws for drywall; a hammer drill, masonry bits, and proper anchors for brick or concrete. They should protect your floor and furniture, clean up the dust, test all the inputs, and leave you with a simple receipt and ideally a workmanship warranty.
A Pricing Sanity Check for a 65-Inch
Based on local ranges, here’s a rough guide:
- Anything like “$80–$120 all-in for a 65-inch” without clarifying the wall or the mount is almost certainly too cheap, and usually hides a drywall-only assumption with surprise upcharges later
- About $180–$280 for a 65-inch on drywall with a basic tilt mount and simple cable tidy is the reasonable band for a straightforward job
- $260–$380 if you add in-wall cable concealment or a quality full-motion arm
- $350–$550 or more for brick, stone, concrete, above-fireplace, or complex in-wall power, as long as the higher price is explained
If two quotes are wildly different, ask the cheaper one: “What exactly changes if my wall isn’t standard drywall?” Their answer tells you a lot.
Where I’d Actually Look
In the Oakville and GTA area, my short list:
- Specialized TV-mounting or low-voltage A/V companies that talk about wall types, VESA, and in-wall power, and show clear pricing or at least a clear process
- Local handymen whose Google reviews specifically mention TV mounting repeatedly, with before-and-after photos and comments on neat cable work
- Word of mouth from neighbours, Nextdoor, condo chat groups, or community Facebook groups — and pay more attention to detailed reviews (“they handled our concrete wall”) than generic five-star blasts
I’m more cautious with generic gig-app profiles that have no TV-specific reviews, big-box installation add-ons where the installer has no local footprint, and anyone who won’t provide at least a short written scope and price before the visit.
A “Never Again” and a “This Guy Was Great”
A neighbour in East Oakville booked a super-cheap online gig for a 65-inch over a media console. The installer hadn’t asked about the wall; it turned out to be drywall over metal studs. He tried wood-stud lag screws, realized they wouldn’t bite, switched to random anchors without checking load ratings, mounted the TV about 8 inches too high with no discussion of viewing height, and left the cables dangling. When asked about hiding them, he quoted an extra $150 on the spot with no clear method. The mount felt springy, the height was uncomfortable, and there was no paperwork or warranty. They later paid a proper A/V installer to redo it, patch the wall, and move it lower — almost double what a decent pro would have charged up front.
A client in West Oakville had a different experience. She’d found a local low-voltage installer because his Google reviews specifically mentioned TV mounting and clean cable work. Before the visit he asked for the TV model, weight, and photos of the wall, gave a flat rate for drywall with a tilt mount plus a clear surcharge if it turned out to be masonry, and confirmed he could provide a COI for her condo if needed. On the day he arrived with a stud finder, a level, and a hammer drill “just in case,” marked the height based on the couch and confirmed before drilling, ran the cables neatly with paintable clips, vacuumed the dust, tested every input, and left an invoice noting the mount model, the wall assumed, and a one-year workmanship guarantee. Six months later the mount was still rock-solid, and she’d recommended him to three other neighbours.
That’s the kind of pro I’d call again without hesitation.
The Bottom Line
For a 65-inch on standard drywall in an Oakville home, budget around $200–$250 all-in, labour, a basic mount if you don’t supply one, and simple cable tidy-up. Add $100–$200 if you want the cables hidden in the wall, and $150–$300 more for brick, stone, or above-fireplace installs.
The number matters less than the planning behind it. Pick the right mount for your exact TV and wall, decide on cables and height before anything goes on the wall, and let one person, you or a pro, own the whole install from layout to final test. Get those three things right and a $200 job goes off without a single regret.