
1August 2026
The Oakville Drywall Price Breakdown: Small vs. Complex
Why Drywall Damage is Often Just a Symptom
Many homeowners view drywall damage as a purely cosmetic issue. However, treating it as a quick cosmetic fix can lead to expensive disasters down the road.
We recently took on a project in Oakville that perfectly illustrates this. The homeowner called us for what they described as a small patch after noticing a few minor cracks and a soft spot on a basement wall. At first glance, it looked like a routine two-hour job.
However, our process always starts with a thorough investigation. Once we opened the wall, we discovered a slow, hidden plumbing leak that had been weeping for months. The moisture had completely destroyed the insulation, rotted sections of the wood framing, and triggered active mold growth behind the surface.
What began as a simple patch quickly evolved into a full restoration project. We had to repair the leak, dry the cavity, treat the mold, replace insulation, and completely rebuild the wall infrastructure.
Drywall damage is rarely the root problem. It is usually the symptom. A crack, stain, or soft spot is your wall trying to tell you that something is wrong behind the scenes. Investing in a proper diagnosis prevents you from throwing money away on a cosmetic band-aid that will inevitably fail again in a few months.
A Controversial Opinion on DIY Patch Kits
If you walk into any local hardware store, you will see shelves lined with DIY drywall patch kits advertised as five-minute fixes. My honest professional opinion is that the kits aren’t the problem, unrealistic expectations are.
The physical act of putting a patch over a hole is the easiest part of the job. The true skill lies in feathering the compound over a wide area, sanding it perfectly level, matching the wall texture, and blending it so it disappears under a fresh coat of paint.
For a tiny nail hole or a picture-hanging ding, a DIY kit is excellent. But once a hole is larger than a few inches, the risk of a noticeable, ugly patch skyrockets. In fact, we frequently get calls from frustrated homeowners who attempted a DIY fix, only to realize that their lumpy, uneven patch stands out significantly more than the original hole did.
A poorly executed DIY repair often costs more to fix in the long run. Correcting excessive compound buildup, visible mesh tape, and uneven sanding marks takes us longer than repairing the original damage from scratch.
You should put down the spackle and call a professional if any of the following apply:
- The hole is larger than about 4 to 6 inches.
- The damage extends into a ceiling.
- You see water staining, moisture, or mold.
- Cracks keep reappearing in the exact same spot.
- The wall has a specific texture like knockdown or popcorn that needs to be matched.
- There is electrical wiring, plumbing, or insulation directly behind the damage.
- The goal is a completely seamless, paint-ready finish in a highly visible area.
Drywall Patching vs. The Finishing Trade
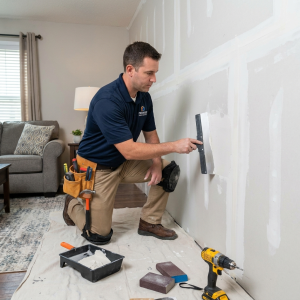
When you hire a low-cost, budget handyman, they focus on filling the hole quickly. When you hire a premium drywall specialist, they treat it as a finishing trade. The materials used by most contractors are similar, but what separates a premium result from an average one is the preparation, craftsmanship, patience, and quality control that go into every step.
A premium, professional process looks drastically different from a budget service and includes several critical steps.
Investigation
Property Protection
Foundation Building
The Art of the Compound
Texture Matching
Quality Control
Spotless Cleanup
Three Questions to Ask Your Contractor
How will you make sure the repair is invisible after it’s painted?
A budget handyman will usually focus on filling the hole and sanding it smooth. A premium professional will talk about feathering the compound over a wide radius, controlling shrinkage, matching textures, and preparing the specific surface sheen so it doesn’t flash through the paint.
Will you inspect for the cause of the damage before repairing it?
If a contractor’s only concern is covering the visible hole, there’s a good chance you’ll be paying for the same repair again in the future. A quality contractor wants to understand why the damage occurred, checking for structural shifting, moisture, or history of previous repair failures—before recommending a solution.
What does your preparation and cleanup process include?
Contractors who cut corners on preparation often cut corners on the repair itself. A premium drywall specialist should explicitly detail how they protect your flooring and furniture, contain ultra-fine drywall dust, and vacuum the workspace thoroughly before leaving.
At the end of the day, a quality drywall repair is about value, not the cheapest quote. Anyone can fill a hole, but making it look like the hole never existed is where experience makes all the difference. Choosing a professional who takes the time to diagnose the underlying issue, protects your home, and delivers an absolutely flawless, invisible finish saves you time, stress, and repeated repair bills down the road.
3 Replies to “How Much Does It Cost to Patch a Hole in Drywall?”