
28September 2026
Painted caulk usually cracks because the joint is moving, the caulk has shrunk, the wrong product was used, or the surface was not prepared properly. Painting too soon can also cause problems, especially when the caulk has been applied too thickly or has not cured completely.
As an Oakville handyman, I have seen many cracked caulk joints around windows, doors, baseboards, crown moulding, kitchens, bathrooms, and exterior trim. In my experience, the visible crack is often only a symptom. The real problem may be seasonal movement, moisture, poor adhesion, an oversized gap, or an unsuitable caulk.
The best repair starts with diagnosing why the caulk failed instead of simply applying another bead over the crack.
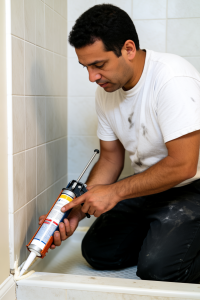
Common Reasons Painted Caulk Cracks
Seasonal expansion and contraction
Homes in Oakville experience changes in temperature and humidity throughout the year. Building materials respond to those changes by expanding, contracting, or shifting slightly.
This movement is especially noticeable around:
-
Window and door trim.
-
Baseboards and crown moulding.
-
Exterior joints.
-
Areas where drywall meets wood trim.
-
Joints between different building materials.
A joint may look perfect during the summer but open again during the colder months. If the caulk cannot accommodate that movement, it may split, pull away from one side, or crack through the middle.
This is one reason I do not automatically blame the caulk. I first look at how much the joint is moving and whether the product was suitable for that location.
The caulk shrinks as it dries
Many water-based acrylic-latex caulks contain moisture that evaporates as the product dries. Some shrinkage is normal, but excessive shrinkage can leave a visible crack or depression.
Shrinkage is more likely to create problems when:
-
The bead is unusually thick.
-
A deep gap is filled entirely with caulk.
-
The joint is wider than the product is designed to handle.
-
The caulk is applied in cool, damp, or poorly ventilated conditions.
-
The product is low quality or not suitable for the joint.
A thick bead may look like a stronger repair, but more caulk does not necessarily mean a more durable repair. If the joint is too deep, the caulk may shrink, remain soft, or fail to cure evenly.
The wrong type of caulk was used
Different caulks are designed for different conditions. A paintable acrylic-latex caulk may work well around interior trim but perform poorly in a wet area or a joint with significant movement.
These are the products I commonly use, depending on the location:
-
Acrylic-latex caulk: Suitable for many interior applications, including baseboards, door and window trim, crown moulding, and small drywall-to-trim gaps. It is easy to tool, cleans up with water, and generally accepts paint well. However, it can crack when used on wide gaps or joints with noticeable movement.
-
Siliconized acrylic: A useful choice when you want better flexibility and moisture resistance than basic acrylic-latex while still needing a paintable product. I use it for some trim, cabinet, and bathroom applications.
-
100% silicone: Appropriate where waterproofing matters, such as tubs, showers, sinks, and backsplashes. Standard silicone remains flexible and handles moisture well, but it generally does not accept paint.
-
Polyurethane: Useful for selected exterior or higher-movement applications where adhesion and durability are important. It can perform well in demanding joints but requires careful application.
-
Elastomeric caulk: Another option for joints experiencing significant expansion and contraction, particularly in exterior applications.
I would not choose a caulk simply because the label says “all purpose.” The decision should be based on movement, moisture exposure, the materials being joined, and whether the joint needs to be painted.
The joint was not prepared properly
Caulk needs a clean, stable surface to adhere properly. Dust, grease, loose paint, moisture, old caulk, and deteriorating drywall can all interfere with adhesion.
When caulk pulls away from one side of a joint, poor surface preparation is one of the first things I investigate. If it separates from both surfaces, I also look for moisture, unstable materials, or an incompatible product.
Applying new caulk over an old, cracked bead is a common shortcut, but it often creates another failure. The new caulk may bond to the old failing layer instead of bonding properly to the trim and wall.
Before applying new caulk, I normally:
-
Remove the failed caulk.
-
Scrape away loose paint and unstable material.
-
Remove dust and debris.
-
Check for moisture.
-
Inspect both sides of the joint.
-
Confirm that the surfaces are sound enough for adhesion.
The caulk was painted too soon
Painting before caulk has cured sufficiently can contribute to cracking, poor adhesion, and an uneven finish.
The required time depends on the specific product and the conditions. Temperature, humidity, ventilation, bead thickness, and the type of paint can all affect the result.
I see homeowners caulk in the morning and paint shortly afterward because the surface appears dry. However, the outside of the bead may be dry while the material underneath is still soft or uncured.
I follow the manufacturer’s instructions rather than relying on a fixed number of hours. If the caulk is still soft, sticky, or unusually wet, I would not paint over it. I would first determine why it has not cured properly.
The gap is too wide or deep
Caulk is not intended to be used as a substitute for every type of filler or structural repair. If a joint is too large, filling the entire space with one thick bead can cause the caulk to shrink, split, sag, or remain uncured in the centre.
A split running directly through the middle of the bead can be a clue that the caulk was stretched beyond its practical limits. It may also indicate that the application was too thick.
For a deep or wide joint, backer rod may be appropriate. It helps control the depth of the caulk and prevents the product from being used as an unnecessarily thick filler.
I do not automatically use backer rod on every repair. A small gap between trim and drywall usually needs only a properly sized bead. But when a gap is deep enough that filling it entirely with caulk would create excessive thickness, I consider a method for controlling the depth.
What Different Crack Patterns Can Tell You
The location and appearance of the failure can provide useful clues. A fine crack through the paint does not necessarily indicate the same problem as caulk pulling cleanly away from the trim.
Fine hairline cracks through the paint
Fine cracks may be related to paint shrinkage, caulk shrinkage, or painting before the caulk was ready. If the caulk underneath remains bonded and flexible, the problem may be mainly in the paint film.
Applying paint too thickly can also contribute to cracking as the paint dries. In these situations, I inspect the caulk beneath the paint instead of assuming the entire joint needs to be removed.
Caulk pulling away from one side
When the caulk separates from one side, I look for:
-
Movement between the two surfaces.
-
Dust or debris.
-
Loose paint.
-
Grease or contamination.
-
Moisture.
-
Poorly bonded trim or drywall.
-
A caulk that does not adhere well to the particular substrate.
This type of failure often points to an adhesion or movement problem rather than simple surface cracking.
A split through the middle
A split down the centre of the caulk may indicate that the bead was too thick, the gap was too large, or the product could not accommodate the movement.
I inspect the depth and width of the joint before making a repair. If the gap is deeper than it appears, adding another thick bead usually does not solve the problem.
The gap reopens every year
A joint that looks good immediately after repair but reopens during the heating or cooling season is probably responding to movement.
This is common around windows, doors, baseboards, and exterior trim. The solution may involve better surface preparation, a more flexible product, improved joint geometry, or correcting a loose or unstable component.
Caulk separates from both surfaces
When the caulk has released from both sides, I look for widespread adhesion failure. Possible causes include:
-
Moisture.
-
Dust and debris.
-
Loose paint.
-
An unstable substrate.
-
An incompatible product.
-
Insufficient curing.
-
Excessive movement.
A good caulk cannot compensate for a dirty or deteriorating surface.
Soft or sticky caulk
Soft, sticky, or unusually wet caulk may not have cured properly. Possible reasons include high humidity, low temperature, inadequate ventilation, an excessively thick bead, or the wrong product for the conditions.
I would not simply paint over it. The failed material should be assessed and removed if necessary before the joint is repaired again.
My Repair Process for Cracked Caulk
Remove the failed caulk
I start by cutting out and removing the old caulk with a sharp utility knife and suitable scraping tools. I try to remove as much of the failed material as possible.
Applying new caulk over cracked material may produce a temporary improvement, but the new bead can bond to the old failing layer instead of the actual wall and trim surfaces.
Inspect the joint
Once the old material is removed, I inspect both sides of the joint. I look for loose paint, drywall damage, moisture, dust, movement, and loose trim.
This inspection is particularly important around bathrooms, windows, doors, baseboards, and crown moulding. These areas may have different causes of failure even when the visible crack looks similar.
Prepare the surfaces
I scrape away loose material and clean the joint thoroughly. Any moisture must be allowed to dry before applying new caulk.
If the surface is dusty, dirty, greasy, or unstable, the replacement caulk may fail just like the original. Surface preparation often takes longer than applying the new bead, but it is one of the most important parts of the repair.
Control the depth when necessary
If the joint is deep or wide, I consider whether backer rod or another appropriate filler is needed. The purpose is to prevent the caulk from becoming excessively thick and to create a more suitable joint shape.
For a small trim-to-wall gap, I usually use a properly sized bead without adding backer rod.
Select the replacement caulk
I choose the replacement product based on the conditions rather than simply matching the old caulk.
For many painted interior trim joints, I generally use a quality acrylic-latex or siliconized acrylic caulk. Wet areas may require silicone or another product specifically designed for moisture exposure. Exterior and higher-movement joints may require polyurethane or an appropriate elastomeric caulk.
The fact that the old caulk cracked does not automatically mean the same product is always unsuitable. The joint may have failed because of preparation, movement, joint size, or curing conditions.
Apply a consistent bead
I apply a consistent bead that contacts both surfaces without spreading excessive material onto the surrounding wall or trim. I then tool it carefully to create a clean joint.
I avoid trying to fill a large or deep gap with one oversized application. If the joint is too large or moving substantially, I address that issue instead of expecting a thicker bead to solve it.
Allow adequate curing time
I give the caulk enough time to cure according to the manufacturer’s instructions. Cure time can be affected by:
-
Product type.
-
Temperature.
-
Humidity.
-
Ventilation.
-
Bead thickness.
-
Joint depth.
The caulk should be ready to receive paint before the painting stage begins. A surface that feels dry does not always mean the entire bead has cured.
Repaint carefully
After the caulk has cured sufficiently, I apply the appropriate paint. I also make sure the surrounding wall and trim are properly prepared.
Paint should provide the finished appearance, but it should not be expected to hide loose material, poor adhesion, moisture, or an unstable joint.
Two Oakville Repair Examples
Cracked window-trim joint
I once worked on a window-trim joint where the homeowner had already recaulked the area several times. The visible problem was a thin crack running along the painted joint, so it initially appeared to be a straightforward caulking repair.
After removing the old caulk, I found loose paint and debris underneath. The previous repairs had been applied over an unstable surface, so the new material never had a reliable foundation.
I removed the failed caulk, cleaned and prepared both surfaces, addressed the gap properly, and applied an appropriate paintable caulk. After allowing it to cure, I repainted the joint.
The important lesson was not simply choosing a new caulk. The lasting improvement came from correcting the surface preparation and considering why the joint was moving.
Baseboard gap in an older home
Another common situation involved a gap between a baseboard and drywall in an older Oakville home. The homeowner had previously filled the gap with a thick bead of basic caulk, but the bead eventually split down the middle.
When I removed the old material, the gap was deeper than it appeared from the surface. Instead of applying another oversized bead, I prepared the joint properly and used an appropriate method to control the depth before applying replacement caulk.
The finished joint looked cleaner because the caulk was not being asked to bridge an unnecessarily deep gap. Once cured and painted, it also had a better chance of accommodating normal movement.
How to Prevent Caulk From Cracking
Choose the product for the location
Use paintable acrylic-latex or siliconized acrylic for many interior trim applications. Use a moisture-resistant product in wet areas and a more flexible, weather-resistant product for demanding exterior joints.
Always check whether the product is paintable before using it in a painted area. Standard 100% silicone is often an excellent waterproofing product, but it generally is not suitable when the joint must be painted.
Prepare the joint properly
Remove failed caulk rather than covering it. Scrape away loose paint, clean the surfaces, remove dust and debris, and check for moisture.
The new caulk needs a stable surface to bond to. If the wall, trim, or substrate is loose, the caulk may crack or separate regardless of its quality.
Keep the bead an appropriate size
Do not keep adding caulk to an oversized gap. A thick bead can shrink, sag, crack, or cure poorly.
If the gap is deep, consider backer rod or another appropriate method for controlling the depth. The goal is to create a suitable joint rather than fill the entire space with caulk.
Follow curing instructions
Do not assume that caulk is ready to paint simply because the surface feels dry. Follow the manufacturer’s instructions and consider the temperature, humidity, ventilation, and thickness of the bead.
Painting too soon can contribute to cracking and poor adhesion.
Consider seasonal movement
In Oakville, seasonal movement is an important consideration around windows, doors, exterior trim, and joints connecting different materials.
For exterior work, I also pay attention to whether the substrate and weather conditions are appropriate for the selected product. A joint that is repaired under unsuitable conditions may fail before the caulk has a chance to perform properly.
When to Call a Handyman
Small, stable interior trim gaps are often reasonable do-it-yourself repairs. However, I recommend getting professional advice when the joint is:
-
Repeatedly cracking after previous repairs.
-
Unusually wide or deep.
-
Exposed to regular moisture.
-
Located outdoors.
-
Showing significant movement.
-
Separating from both surfaces.
-
Associated with loose trim, damaged drywall, or possible water intrusion.
-
Still soft or uncured after the expected curing period.
If you have repaired the same crack once or twice and it keeps returning, stop adding another layer of caulk. The recurring crack may indicate excessive movement, an improperly sized joint, moisture, loose materials, poor adhesion, or another underlying issue.
Final Advice From an Oakville Handyman
My strongest advice is not to treat caulk as a simple filler. Treat it as part of the joint.
The most durable repair comes from understanding:
-
What materials are being joined.
-
How much movement the joint experiences.
-
Whether moisture is present.
-
How wide and deep the gap is.
-
Whether the surfaces are clean and stable.
-
Whether the caulk needs to accept paint.
-
How long the product needs to cure.
A cracked bead of caulk is often a symptom rather than the actual problem. Remove the failed material, inspect the joint, prepare the surfaces, select the right product, apply a properly sized bead, and allow it to cure before painting.
Spending extra time diagnosing the joint can save you from repeating the same repair every year.
One Reply to “Why Does Caulk Crack When Painted?”