5June 2025
A dripping faucet is more than just an annoyance, it wastes water, increases your utility bills, and can even stain your sink over time. If you have an old-fashioned (compression) faucet, the good news is that fixing a leak is usually a straightforward DIY project. Here’s a detailed, easy-to-follow guide to help you stop that pesky drip for good. And remember, if you ever feel out of your depth, Handyman Oakville is just a call away to lend a professional hand!
Why Do Old-Fashioned Faucets Leak?
Most leaks in traditional faucets are caused by worn-out washers or O-rings inside the valve seat. Over time, these small but essential parts degrade, allowing water to seep through even when the tap is off
.
Tools and Materials You’ll Need
-
Flat-head and Phillips screwdrivers
-
Adjustable wrench or crescent wrench
-
Replacement washers and O-rings (bring the old ones to the hardware store for an exact match)
-
Plumber’s grease
-
Penetrating oil (optional, for stuck parts)
-
Rag or towel
Step-by-Step Instructions
1. Turn Off the Water Supply
Before you start, shut off the water valves under the sink to prevent any accidental flooding. Open the faucet to release any remaining water in the pipes
.
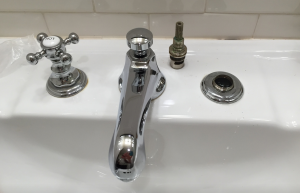
2. Remove the Faucet Handle
Use a flat-head screwdriver to pry off the decorative cap on top of the handle. Unscrew the handle and gently pull it off. If it’s stuck, a little penetrating oil can help loosen it
.
3. Loosen the Packing Nut and Remove the Stem
With an adjustable wrench, loosen the packing nut beneath the handle. Carefully pull out the faucet stem. In older faucets, this may require a bit of wiggling, but it should come free without too much force
.
4. Inspect and Replace the Washer and O-Ring
At the bottom of the stem, you’ll find a rubber washer held by a screw. Remove the screw and swap out the old washer for a new one. Also, check the O-ring (a rubber ring around the stem) and replace it if it looks worn or cracked. Coat both new parts lightly with plumber’s grease for a better seal and easier installation
.
5. Reassemble the Faucet
Reverse the steps: reattach the stem, tighten the packing nut, and put the handle back on. Don’t forget to replace the decorative cap
.
6. Turn the Water Back On and Test
Slowly turn the water supply valves back on and test your faucet. If the leak is gone, congratulations! If not, the valve seat might be corroded or there could be another issue—sometimes it’s best to call a professional at this point
.
When to Call Handyman Oakville
While fixing a leaky faucet is a great DIY project, some situations, like stubborn corrosion, hard-to-remove parts, or persistent leaks, are best left to the pros. If you’re in Oakville and need expert help, Handyman Oakville is ready to tackle any plumbing repair, big or small. We’ll save you time, hassle, and ensure your faucet is fixed right the first time.
Stop the drip, save water, and enjoy peace of mind—whether you DIY or call in the experts at Handyman Oakville!